Re-inventing the Wilderness: Part 6 - Landmarks
In this blog series, I will dissect the spatial elements of wilderness environments and explore how tabletop-friendly prep and mechanics could be leveraged to revise exploration procedures. If you’re looking to start from the beginning, you can find Part 1 here.
“But I don’t even know the way back to my own country,” pleaded Edmund.
“That’s easy,” answered the Queen. “Do you see that lamp?” She pointed with her wand and Edmund turned and saw the same lamp-post under which Lucy had met the Faun. “Straight on, beyond that, is the way to the World of Men. And now look the other way”—here she pointed in the opposite direction—“and tell me if you can see two little hills rising above the trees.”
“I think I can,” said Edmund.
“Well my house is between those two hills. So next time you come you have only to find the lamp-post and look for those two hills and walk through the wood till you reach my house. You had better keep the river on your right when you get to it.”
C. S. Lewis, The Lion, the Witch and the Wardrobe (1950)
We use visual information all the time in dungeons; the yawning entrance, the shifts in aesthetic as you delve deeper, clues to a puzzle, or even the hints of a deadly trap. In fact, it’s become common game-advice to present as much information as possible, to foster engaging decisions in play. And we see the word ‘Landmark’ crop up in the popular Landmark/Hidden/Secret refrain, but for overland wilderness travel it takes even more forms.
Landmarks are the reference points we rely on in the world above to convey visual information. They tell us where we are, can help us navigate and can share valuable context (or even elicit a specific emotion). They are typically found at three scales:
- Micro: Small, localized (e.g. tree stump, skeleton).
- Meso: Medium-sized, unique within their area (e.g. small house, witch’s hut).
- Macro: Large, visible from great distances (e.g. massive tower, the North star).
Micro Landmarks
When navigating through repetitive environments, you can use micro landmarks to disrupt the locale’s pattern and highlight important points or paths.
This type is most often used to highlight the start of a natural path. Without these micro landmarks, only man-made paths such as roads and trails are simple to navigate in the shared game fiction.
You find a posed skeleton pointing north-west, or your sentient torchlight flickering in a cardinal direction against the wind, or you hear the hum of a magic ley-line.
The other use is flavour; I’m not talking about fanciful fluff here, but genuine gameable information about the space you’re moving through. This may be a shift in foliage hue, terrain texture, sound, smell etc. Instead of marking the start of a path, it’s used to acknowledge the adjacent Points of Interest and signify local changes along a path.
Following the coast south from the village, the fishing boats start disappearing from the horizon, the sand gives away to pebbles, then stones that require you to clamber over, before long you’re hopping over rock-pools as cliffs rise to your left, the water here has an odd ruddy colour - you’re nearly at Bloodsong Grotto.
None of these details are POIs in themselves, but this flavour allows players to navigate both by prior instruction (eg. an NPC says to follow the coast until it’s rocky and they find a red-water cove) or prior visit (eg. they want to find their way back here). Personally, I use this as an at-the-table technique, rather than a part of prep. Simply, consider how the environment changes in the transition between the POI you’re departing and the one you are approaching.
For micro landmarks especially, uniqueness is paramount. It is only by actually disrupting the normal environment do these details actually become micro landmarks; especially because of their smaller, subtler scale. If they aren’t unique, players won’t pay much attention.
Meso Landmarks
Whilst micro landmarks are all about paths, meso landmarks are tied to Points of Interest (POIs). As previously discussed, we typically only use dead-end paths when leading to dungeons. So, before they explore a Point of Interest, players need to actively make a decision to engage with it, as opposed to simply moving along their chain of paths to the next site.
Meso landmarks are effectively “landmark information” (in the landmark/hidden/secret sense) about a Point of Interest. What can we see as we approach or pass it?
South of the road, you see yellow-streamers fly from a collection of huts at the cliff’s base. A great fire burns stubbornly infront of a huge stone tree, casting a twisting shadow up the cliffside.
At the dungeon-scale, we’re dealing primarily with meso landmarks, so these are not really new or unique. The key takeaway here is to communicate what the POI is (a community, a monster lair, faction fort, or something weird) from a distance. The information presented here will decide whether players investigate, take a note and move on, or straight-up ignore your locations.
Macro Landmarks
Walt Disney’s Imagineering team popularised the term “Weenie” to refer to a prominent, visually striking landmark that serve as focal point to draw players (or visitors of theme parks) towards them, and help them orient around it. It has been adopted in video game design, and in abstracted tabletop exploration it takes the form of the ‘macro landmark’.
These landmarks are tall, striking and unique. Often they are omnipresent, visible across the entire region (or area). That may seem excessive to you, even in a fantasy world - so how about some real-world examples:
| Landmark | Visibility Range (miles) | Visibility Range (per 6 mile hex) |
|---|---|---|
| Mount Fuji | 62 | 10 |
| Burj Khalifa | 59 | 9 |
| Willis Tower | 40 | 6 |
| Eiffel Tower | 43 | 7 |
| CN Tower | 37 | 6 |
| Empire State Building | 30 | 5 |
Most of these examples are man-made because that often guarantees a unique silhouette; but in your fantasy world you can conjure unique natural macro landmarks.
A great tree, the skeleton of a titan, a small moon hovering over the Imperial city etc.
You can also use man-made structures, but there will be an player expectation that they can explore it in a more granular way, so they would likely be megadungeons or cities.
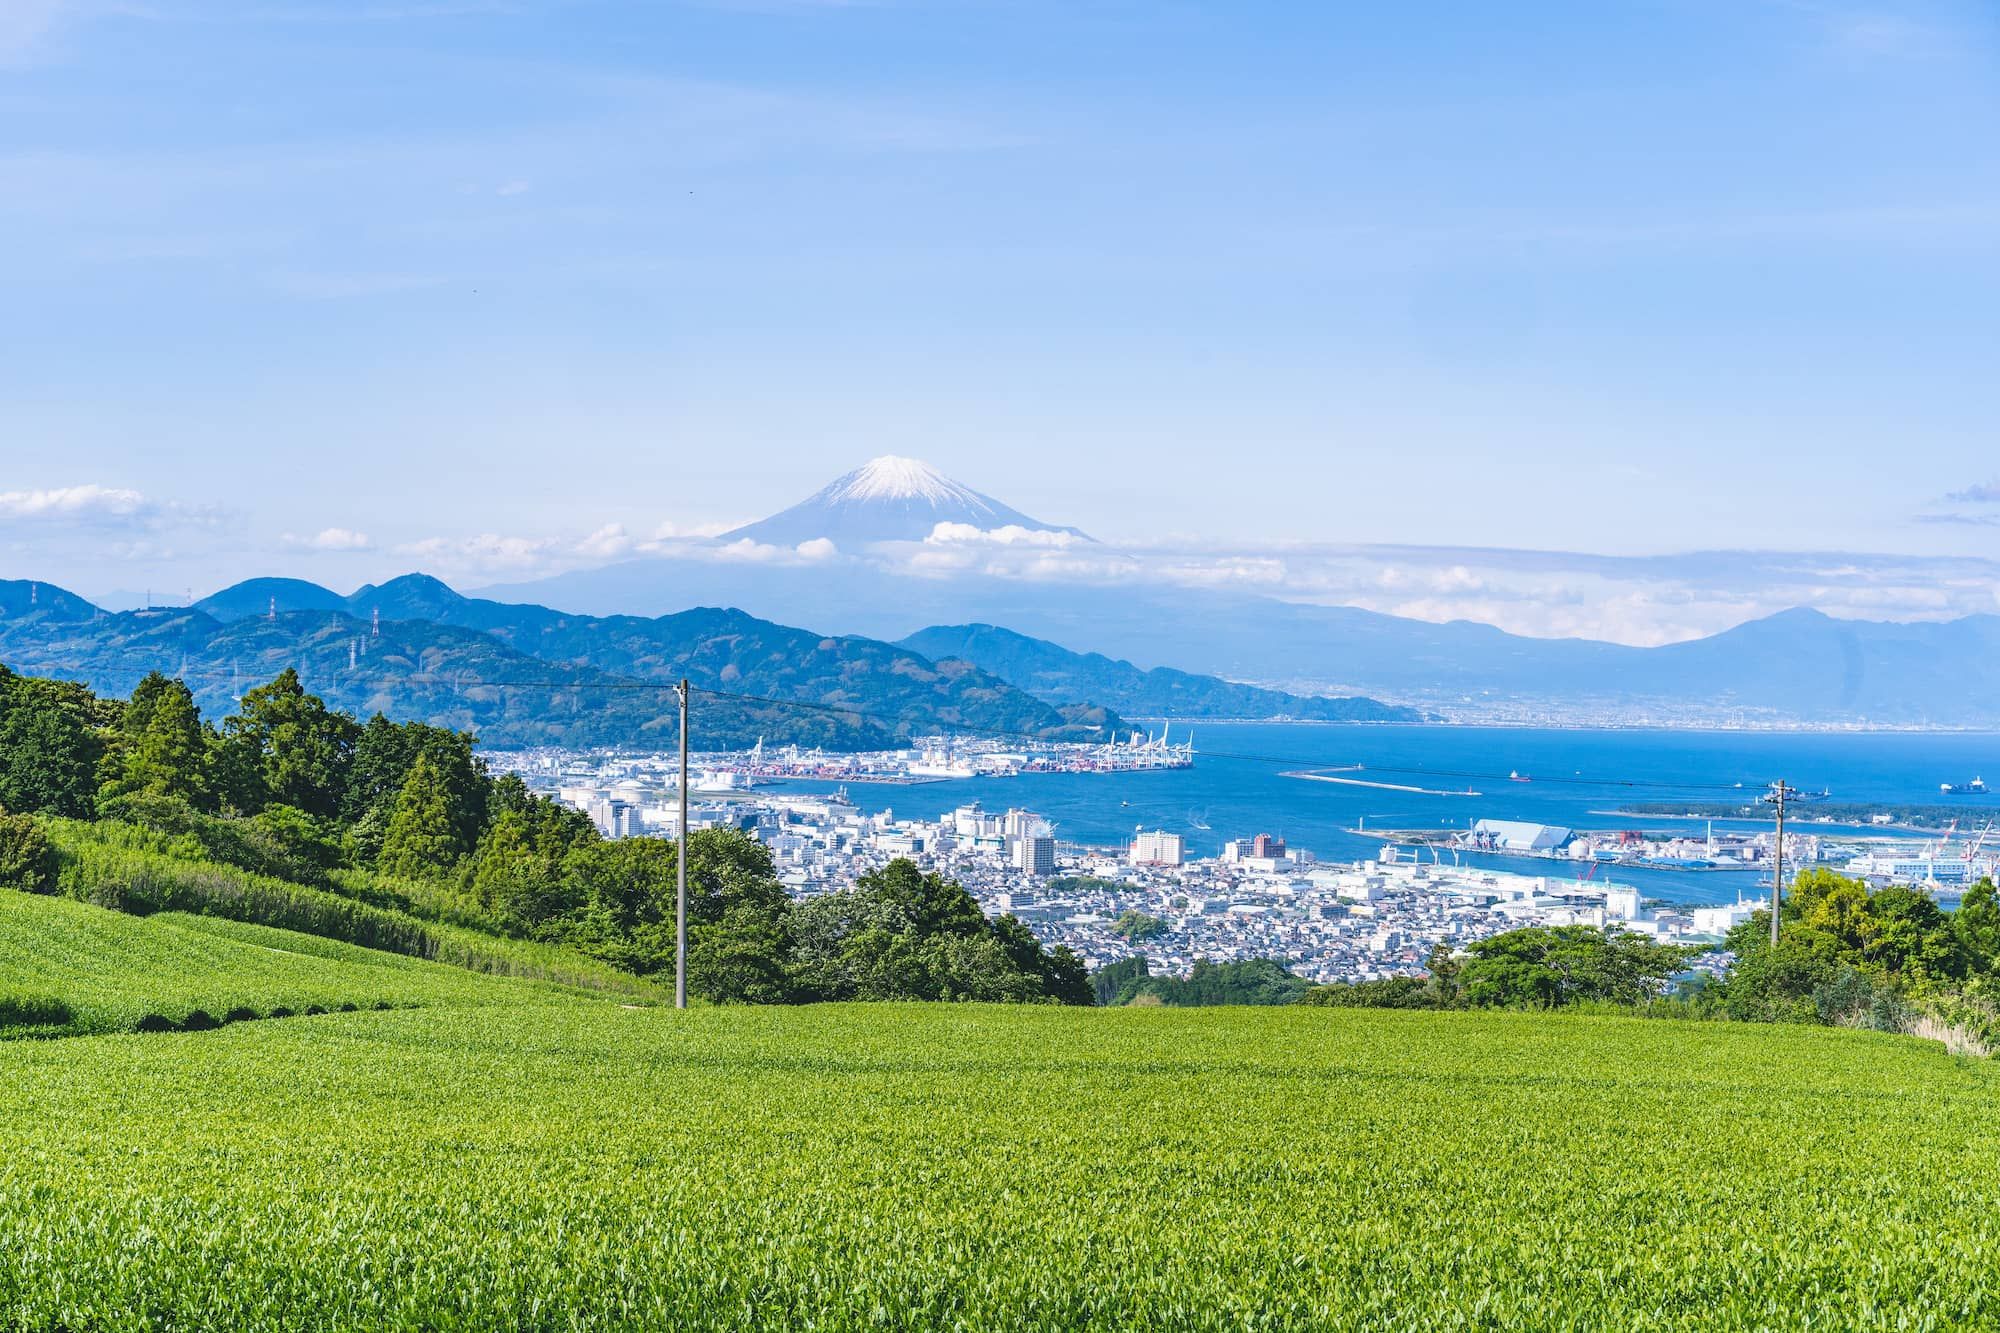 Mount Fuji visible from over six 6-mile hexes away
Instead of tracking visual ranges of a macro landmark, I recommend having a single regional landmark visible across the whole region. If you want additional macro landmarks, I recommend making them Area specific instead (your region will typically have 3 distinct Areas/biomes). Use common sense when abjudicating visibility.
Vantage Points
In the second post of this series, I introduced the concept of elevation along paths. We’re returning to the same technique here. I’ve shifted all the numbers down by 1 (eg. lowlands are now -1, instead of 0 in the original post) and there are symbols for shorthand (as POIs are often labelled with numbers).
Using a popular overland game map (Legend of Zelda: Breath of the Wild), let’s revisit the original categorisation:
Lowlands (-1 OR ˅)
- Hyrule Field: Central region, generally flat and expansive.
- East Necluda: Low-lying areas with gentle hills and plains.
- Faron Grasslands: Southern region with dense forests and low elevation.
- Lake Hylia: Surrounding areas are mostly lowlands.
Montane (0 OR blank)
- Lanayru Wetlands: Slightly elevated wetlands and marshes.
- Hateno Village: Situated in the hilly regions of East Necluda.
- Gerudo Desert: While generally flat, the edges and some dunes qualify as montane.
- Great Plateau: The starting area with elevated plateaus but not reaching high mountains.
Subalpine (1 OR —)
- Tabantha Frontier: Hilly region with colder climates and higher elevations.
- Hebra Mountains (lower parts): Higher than foothills but not yet in the alpine range.
- Mount Lanayru (lower slopes): Mid-elevation slopes leading up to the summit.
Alpine (2 OR =)
- Hebra Mountains (mid-upper parts): Snow-covered areas with rugged terrain.
- Mount Lanayru (mid-upper slopes): Cold, snowy regions with steep climbs.
- Death Mountain (mid-upper parts): Volcanic region with high elevation.
Summit (3 OR ≡)
- Hebra Peak: The highest points in the Hebra Mountains.
- Mount Lanayru Summit: The peak where the Spring of Wisdom is located.
- Death Mountain Summit: The highest point in the volcanic region, where Vah Rudania is situated.
Here you can see 3 tiers of mountain elevation (subalpine, alpine and summit), a solid default (montane) and the occasional valley (lowlands). Most paths will only increase or decrease elevations in 1-step increments (eg. moving from lowlands to montane) if at all. Some man-made or magical paths could break this rule (eg. a dwarven elevator that takes you to the summit of a major mountain).
If you seek a vantage point (an area clear of foliage obstruction, or a height advantage) you can see into nearby hexes, even without a direct path to them. If you are of a greater elevation to those neighbouring areas, you can see more information, such as meso landmarks or even some micro landmarks that note a path. Only macro landmarks can be seen from lower elevations.
Vantage points are not curated/designed. Any player should find a good vantage spot with relative ease. Players should describe how they find the vantage spot, because it gives context for what they see - but actually finding the vantage point should not be difficult.
A cliff outcropping, a sturdy climbable tree, the top of the guard’s tower, a levitation spell
In summary, vantage points grant players information about their surroundings. Instead of the hex procedure of describing neighbouring terrains and prominent hex features, players can actually uncover new routes and POIs using logical site-lines.
What’s to come…
In the final post of this series, we will present more of a start-to-finish process for building and running a curated pointcrawl wilderness. Hopefully it turns my rough musings into something more valuable in your GM prep (or at the very least, neatly summarise the previously covered techniques).
Further reading
https://diyanddragons.blogspot.com/2019/10/landmark-hidden-secret.html
https://maziriansgarden.blogspot.com/2021/08/using-landmarks-in-wilderness-travel.html
https://blog.d4caltrops.com/2022/10/d100-wilderness-landmarks-d100-overland.html
https://goblinpunch.blogspot.com/2024/01/hexcrawls-kinda-suck.html
https://traversefantasy.blogspot.com/2023/05/od-and-outdoor-survival.html